Bring Personalization at Scale Using Adobe Experience Platform to Your React Native Mobile Application
Co-author: Asim Chatterjee.
This post explains how Adobe Experience Platform and Adobe Experience Cloud can be integrated with React Native mobile applications and how we can drive personalization via Adobe Target on the application and enable Adobe Analytics as the reporting source for Adobe Target (A4T).
Adobe Experience Platform’s usage is growing tremendously due to its vast offerings and capabilities by providing an open, intelligent, real-time platform that solves customer problems by accelerating time to value. IT & businesses are mostly moving towards React Native technology, which allows the building of robust cross-platform apps that look entirely native, easy, and cost-effective.
For this post, we are following the below steps:
- Creating a React Native App
- Installing Adobe Experience Platform Mobile SDK and required packages in the app
- Setting up Adobe Experience Platform environment for basic integration, creation of Segments for personalisation and activating those to Adobe Target
- Personalising user experience in mobile App via Adobe Target and capturing performance metrics in Adobe Analytics
Following is a typical data flow from a Mobile Application powered by Adobe Experience Platform Mobile SDK.

Create a React Native app
The following article explains how a simple React Native mobile application can be created:
https://reactnative.dev/docs/getting-started#interactive-examples
Install Adobe Experience Platform NPM packages
Now, we need to install Adobe Experience Platform NPM packages in the mobile application. This can be installed from NPM command:
npm install @adobe/react-native-aep{extension}We can add the following packages from the table below:
@adobe/react-native-aepcore
@adobe/react-native-aepuserprofile
@adobe/react-native-aepedge
@adobe/react-native-aepedgeidentity
@adobe/react-native-aepassurance
@adobe/react-native-aeptarget
Schema Design and Dataset Creation
Let us now move into Adobe Experience Platform, the first step is to create the schema and the data set which will be consuming the data from Mobile App platform. For this use case, we will create an event schema and will create a data set to map that with this event schema. The tracking requirement will be limited lifecycle data tracking, Screen load and click event data tracking and hence we would design the schema accordingly. Our primary identity and secondary identity will be mapped to ECID and hashed email ID respectively. We need to create a data set and map it to the event schema we created just now.
Note: We need to ensure to switch on the profile toggler for both the event schema and the dataset to enable the data for profile.
For more details, please refer to https://experienceleague.adobe.com/docs/experience-platform/xdm/schema/composition.html
Edge configuration
Adobe Experience Platform Edge Network is a single gateway for multiple data transfers. We use Edge to send the data to Adobe Experience Platform. In this post, we are going to focus on the integration of Adobe Experience Platform with the React Native platform. This includes a few standard steps, and you can find detailed instructions here: https://developer.adobe.com/client-sdks/documentation/
DataStream configuration & Launch configuration
A DataStream is required to route data from the Adobe Experience Platform Edge Network to one of the end systems — Adobe Analytics, Audience Manager, Adobe Experience Platform, etc. We will toggle on Adobe Experience Platform and Adobe Target for this use case. Once DataStream is configured, we need to configure Launch property, install the extensions, and publish the changes.
Experience Data Model (XDM) schema Inclusion in the Mobile Application
We need to now add the schema design based on our use case in App.js file both on click and on load. We also need to import the Adobe Experience Platform packages.
import { MobileCore} from '@adobe/react-native-aepcore';
import {Edge, ExperienceEvent} from '@adobe/react-native-aepedge';
import {Identity} from '@adobe/react-native-aepedgeidentity'
import {
  Target,
  TargetOrder,
  TargetParameters,
  TargetPrefetchObject,
  TargetProduct,
  TargetRequestObject
} from '@adobe/react-native-aeptarget';
Let’s add the following in the app .js and design to pass the information in a similar way which has been configured in schema for screen load and link tracking
Screen Load
var xdmData  = {"eventType":"web.webpagedetails.pageViews",
"_atag": {
    "customschema": {
        "pageInfo": {
            "pageName":"welcomescreen",
            "Channel":"reactapp",
            "userType":"testprofile3",
                           }
    }
},
"web" : {
    "webPageDetails":{
        "pageViews":{
            "value" : 1
        }
    }
}
}
let experienceEvent = new ExperienceEvent(xdmData);
Edge.sendEvent(experienceEvent);Link Click
function expLink(){
var xdmData  = {"eventType":"web.webinteraction.linkClicks",
"_atag": {
    "customschema": {
    "linkInteraction": {
            "linkName":"test_link",
            "linkType":"other",
                           },
    "pageInfo": {
                  "pageName":"welcomescreen",
                  "Channel":"reactapp",
                  "userType":"testprofile3"
               }
    }
},
"web" : {
"webInteraction":{
"linkClicks":{
"value" : 1
}
}
}
} let experienceEvent = new ExperienceEvent(xdmData);Edge.sendEvent(experienceEvent);
Initializing the Application & Lifecycle Tracking
Initializing the SDK should be done in native code inside your AppDelegate (iOS) and MainApplication (Android). Details about how to install and register the extensions required for the current implementation and capture lifecycle tracking can be found here.
https://developer.adobe.com/client-sdks/documentation/getting-started/get-the-sdk/
Validation through Adobe Experience Platform Assurance
We will be using Adobe Experience Platform assurance for the validation; in case you need details about the Assurance initialization, please refer to
Verifying lifecycle calls
Go to the Events section of the navigation panel and look for the Lifecycle event type — Ensure lifecycle events are firing based on the app lifecycle actions.

Segment Creation in Adobe Experience Platform
We would like to now create a simple segment for the users whose userType equals “testprofile3”. This is standard segment creation steps in Adobe Experience Platform
Configure personalization destination
We can now start configuring the personalization destination. For our use case, we will be using Adobe Target as the destination. Refer here for more details.
Create an Active-On-Edge merge policy
After we create the destination connection, we must create an Active-On-Edge merge policy. Refer here for more details.
Activate the segment to destination
We will now activate the segment we created to the Adobe Target destination.
Design the Personalization on Application
Since all Adobe Experience Platform prerequisites have now been completed, we will move towards creating an activity. To achieve the on-page personalization use case, we will add a location parameter for Adobe Target on click. The idea here will be to show the experience on click for the users whose user type equals “testprofile3”.
Let us add a couple of lines of script in App.js file, which will get triggered on the click of the button.
var request1 = new TargetRequestObject(
  'testpoctarget1',
  null,
  'defaultContent1',
  (error, content) => {
    if (error) {
      console.error(error);
    } else {
       console.log(
          "Adobe Target content:" +
            content +
            " Text Content: " +
            JSON.parse(content).text
        );
  targetresponse = JSON.parse(content).text;
        console.log(targetresponse);
    }
}
);Set up an activity in Adobe Target
We can now create an activity in Adobe Target by adding the same location parameter which had been added in App.js in the prior step i.e., “testpoctarget1”. Let’s select the segment we have activated to the Adobe Target destination.
To validate the activity being delivered for the respective segment, click to fire mbox call, and you will be able to see the JSON we had added in Adobe Target.

Set up the report [reporting source as Adobe Analytics]
Next step would be to select the goal, this time we will select Adobe Analytics as the reporting source so that we can have A4T report to measure the effectiveness.
Here, we need to be extremely mindful to do a few steps as a prerequisite to enable A4T reporting, which we will discuss in the next section
Enabling A4T for react native
To enable A4T, we need to follow the steps –
a) Add Adobe Analytics extension to Launch Library
b) Select Adobe Analytics report suite, we need to create a report suite if not created already
c) Add one more NPM package for enabling A4T
@adobe/react-native-acpanalyticsd) Add analytics import method in app.js file
import {ACPAnalytics} from '@adobe/react-native-acpanalytics';e) Register analytics extension
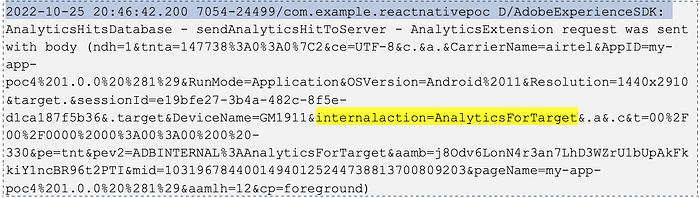
Analytics.registerExtension();As part of successful validation, we would be able to see an analytics server call where action would be mentioned as “analyticsForTarget”
Create a A4T workspace dashboard to measure the effectiveness
Let us now, create a quick A4T dashboard in analysis workspace to see if A4T is working as expected,

Summary
As mentioned above, integrating Adobe Experience Platform with the React Native Mobile Application using the Mobile Edge SDK needs to have specific npm packages to be installed to have measurement tracking. Adobe Experience Platform Assurance can be used for the validation. A4T enables you to track the effectiveness of Adobe Target personalization activities and can be achieved by importing specific npm packages as mentioned above.
Mobile technologies are evolving day by day and at Adobe, we work tirelessly to keep up with the ever-changing technology landscape to support our customers in helping them and reduce the time to carve out various integration with Adobe Experience Cloud.
Considering to move to Adobe Experience Cloud Platform? Contact Adobe Professional Services for a smooth and enriching experience.
And if you’re interested in learning more from our Professional Services thought leaders, visit our blog series page.
Contributors

Asim Chatterjee is a Digital Marketing Architect working with Adobe, having 12+ years of experience in business and tech-consulting. Asim helps organisations going through Digital Marketing Transformations, using data driven decisioning, and delivering omni-channel customer experiences.

Shikhar Saxena is Senior Enterprise Architect with Adobe, having 17+ years of experience. He is a hands-on technologist with a proven track record in architecting customer experience ecosystems and bringing together business and IT teams to work together to meet the organization’s goal: to design and deliver exceptional customer experiences.