Hands-On with Adobe Document Generation in Microsoft Power Automate
Generate Word or PDF documents automatically using Adobe Document Generation actions in Microsoft Power Automate.

These days, people are looking to automate many everyday actions within their organization. In a world where people are more commonly having smart homes, people get more used to having the bots do much of the tedious work. By becoming more comfortable in this venue, people are expecting more ways to automate tasks at work.
One of the everyday tasks that people need to get done in their work is generating documents. Whether this is contracts, employee on-boarding paperwork, brochures, statements, or invoices, creating documents using Adobe Document Generation can save a considerable amount of time copying and pasting content into Word documents. What’s more, it can also ensure that things are on-brand and consistent.
Adobe recently announced the release of Adobe Document Generation for Microsoft Power Automate as part of Adobe PDF Services. The new connector allows you to take data from any of the 300+ connectors in Microsoft Power Automate and populate data dynamically into Microsoft Word templates to generate Word or PDF documents.
This article will explore getting started using Adobe Document Generation with Microsoft Power Automate and share some ideas of how you can get started.
The scenario
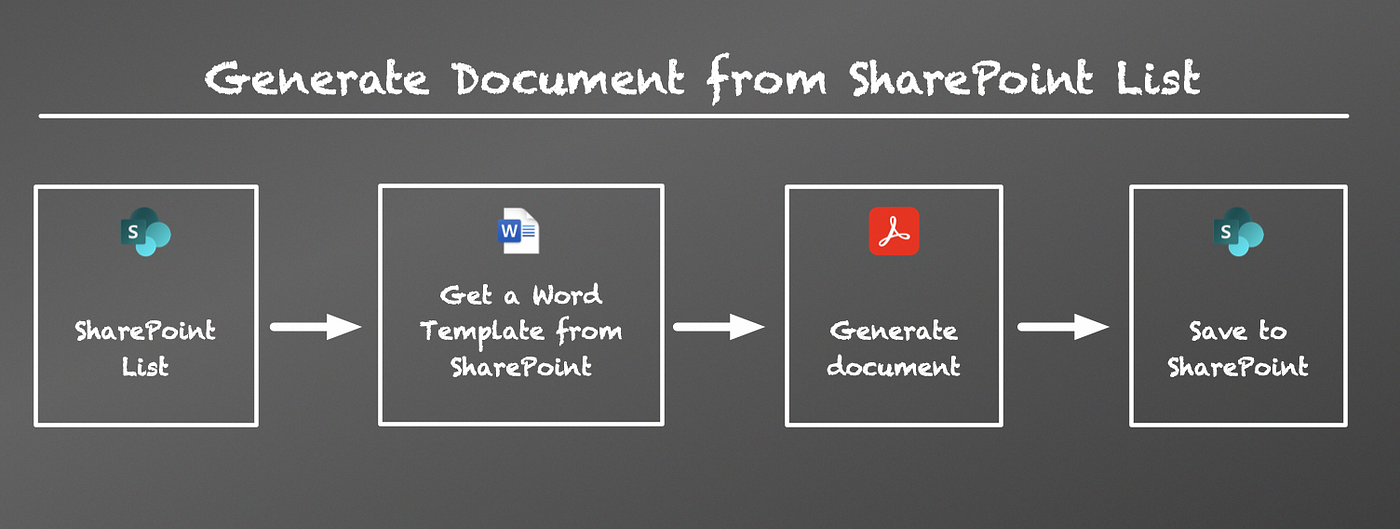
For the scenario we will walk through here, we will use a Microsoft Lists (or SharePoint List) to manage candidates for a job opportunity. We will trigger the flow from a selected item in a list to generate the document and save a copy in SharePoint. We will even show a couple of nifty tricks like sending for Approval, use Protect PDF, or send for signature using Adobe Sign.
Getting access to Adobe PDF Services
To help you easily and quickly get started using Adobe PDF Services with Microsoft Power Automate, you can sign up for a trial easily here. All you will need is a free Adobe ID, which takes a few moments to sign up if you don’t have one already. Adobe PDF Services is a set of services that allow you to create PDFs, export them into different formats, Extract PDFs into different formats, and many other actions. Adobe Document Generation is part of Adobe PDF Services. It is available as a free trial on Adobe I/O or purchased as pay-as-you-go from AWS Marketplace.
If you are already a subscriber of Adobe PDF Services, you can get your credentials by logging in to Adobe Developer Console, selecting your Project and getting your credentials from
Once you have signed up and generated your credentials keep the credentials open as you will need them to authenticate Adobe PDF Services in Microsoft Power Automate.
Create your connection
Now that you have your credentials for Adobe PDF Services, you will need to create a connection in Microsoft Power Automate if you haven’t done so already.
- Log into Microsoft Power Automate.
- In the sidebar, expand Data and click on Connections.
- Click on New connection.
- Choose Adobe PDF Services (preview).
- Copy the values from the prior registration for the Client Id, Client Secret, Organization ID, Technical Account ID, and Base 64 Encoded Private Key.
- Click Create.
Creating your first flow
To get started, we will create a flow based on the selected item in Microsoft Power Automate.
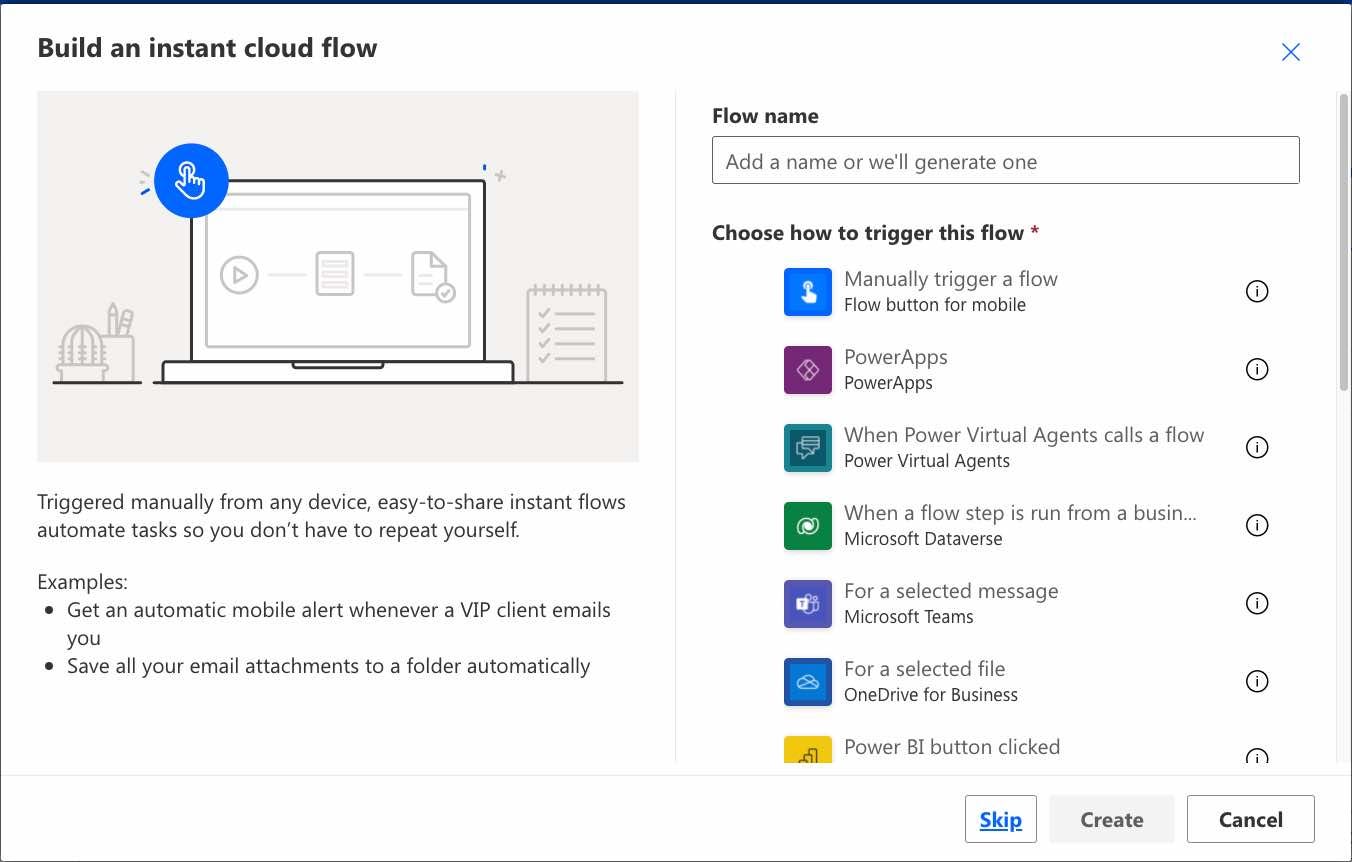
- In Microsoft Power Automate, on the sidebar, click on + Create.
- Click on Instant cloud flow.
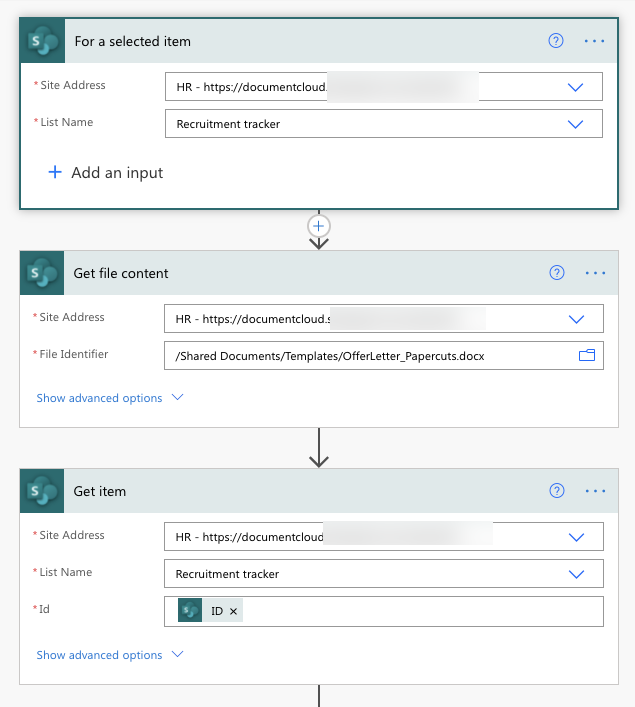
- Set your Flow Name, and under How to trigger this flow, select For a selected item (SharePoint).
- Once the flow loads set the Site Address and List Name for your SharePoint List.
As our next step, now we need to get the file contents of the Word template.
- Click + New Step.
- Search and select SharePoint.
- Select Get file content.
- Set the Site Address and File Identifier to where your Word template is located.
The next thing you will want to do is get the information and properties from the item in the SharePoint List.
- Click + New Step.
- Search and select SharePoint.
- Select Get Item.
- Set the Site Address and List Name for your SharePoint List.
- Under the Id field, set it to the ID variable from the For a selected item step.
Your flow now should look something like this:
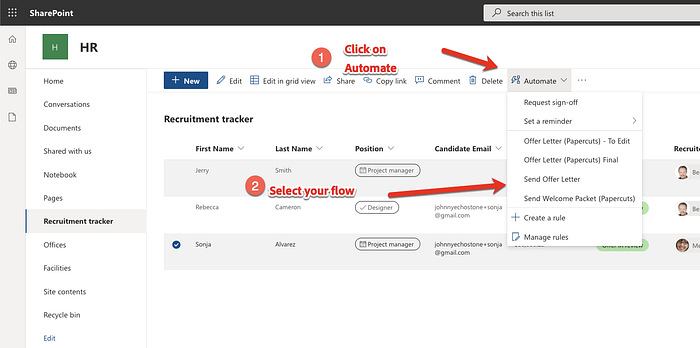
At this point, this can be a helpful point to test your flow. Test your flow by triggering it from the Automate menu in your SharePoint list.
We are going to want to get the body JSON output from the Get item action. We can use this JSON output to place tags in the Word template using the Adobe Document Generation Tagger.

Create a Word template
Now that you have the sample data from your flow, we need to add the tokens are text tags into your Microsoft Word document. If you haven’t already installed the Adobe Document Generation Tagger add-in for Word, you can do that here. While you do not have to use the templates and place them in by typing using this syntax, the Adobe Document Generation Tagger makes it much more approachable, mainly if you are a designer and not comfortable inputting the tags.
- Open your Word template.
- Open Adobe Document Generation Tagger from the ribbon. Click Get Started.
- In the Paste JSON Data field, paste the body JSON data that we copied from our flow.
- Click on Generate Tags.
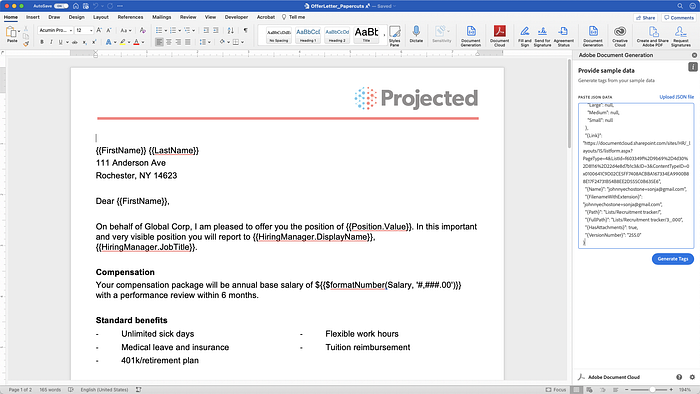
You can now place fields into the template using the Basic or Advanced Tags.
Once you import the JSON, you can enter your fields in the document. For better guides on using the tagger, see the videos and documentation here, or there are some excellent hello world guides available.
Once you have tagged your Word template, save it back into SharePoint in the place referenced in your flow.
Add document generation to your flow.
Now that you have saved your document, we need to add Adobe Document Generation step to your flow.
- Navigate to your flow in Microsoft Power Automate.
- Click + New Step.
- Search and select Adobe PDF Services.
- Select the action Generate document from Word template.
- In the Template File Name, you can set the name to whatever you want as long as the file extension is .docx.
- Use the Dynamic content panel to find and select body variables from the Get item action in the Merge Data field.
Your result should look something like this:

Add additional actions after document generated
Once you have your document generated, you might want to do something with it. For any one of these, you can add the action easily after the Generate document from Word template file. Here are some samples that you can use for reference. Each of these assume that you have completed each of the steps above and you are adding these to the end of your flow. When adding a step, search for name of the actions listed below.
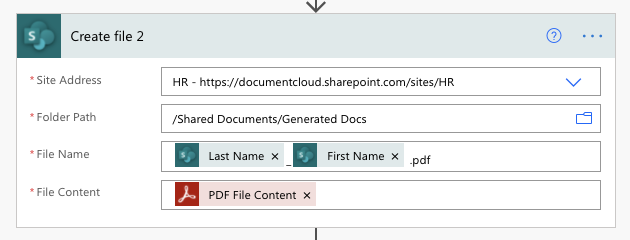
Save to SharePoint
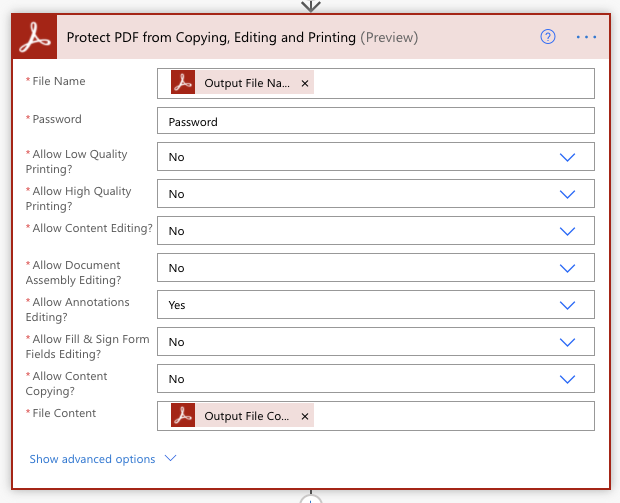
Protect PDF with a password
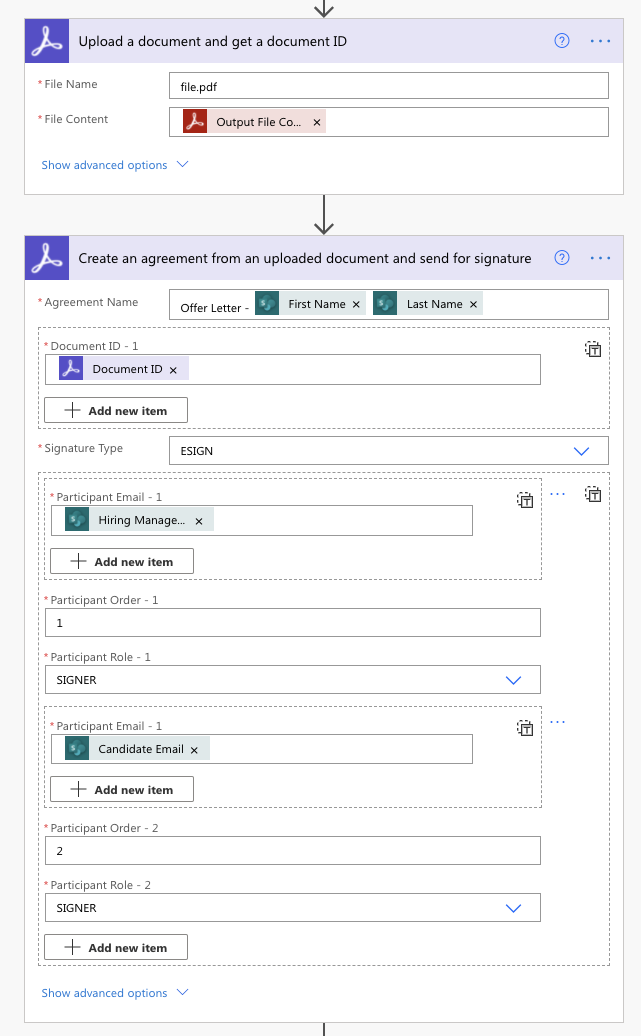
Send for signature using Adobe Sign
Send as attachment in an email

Final thoughts
You can learn more about how Adobe Document Generation works with Microsoft Power Automate by viewing our Papercuts (now called Paper Clips) which walks through how to get started:
Adobe Document Generation provides a great way to take your data from a variety of different sources and allows you to generate a document using a Word-based template. Using this in Microsoft Power Automate will enable you to easily create documents from your data in the Microsoft Dataverse, SharePoint, or the other 300+ connectors in Microsoft Power Automate. Unlock your ability to automate documents like contracts, reports, and proposals without copying and pasting.
If you would like to get started, start an Adobe PDF Services API trial from Adobe I/O, review documentation, and get started on your document automation journey.