Why You Should Use Adobe Document Generation API with Adobe Sign
Adobe Document Generation API provides a lot of tools to automate documents that you can’t do just with Adobe Sign.

Adobe Sign, our cloud-based e-signature service, is used by over 50% of the Fortune 500 and is used for contracts, forms, and all sorts of other use-cases. However, there are also areas where Adobe Sign has some limits, and there are excellent reasons why Adobe Sign, combined with Adobe Document Generation API, makes a fantastic combo.
Adobe Document Generation API is a service included in Adobe PDF Services API that allows you to take your Microsoft Word-based templates and JSON data to merge them into one document with conditional logic, dynamic tables, and other features. In the end, you get a Word or PDF document that can be Adobe Sign-ready. There is even a playground where you can play with Adobe Document Generation API and see how it works.
In this article, we will explore some of the ways in which Adobe Document Generation API complements Adobe Sign.
You can tag documents using the same tools

For users familiar with using Adobe Sign, there are a number of ways to tag documents. Text Tags allow you to place fields inline in Microsoft Word and other documents. Form fields in PDFs can be read and used by Adobe Sign. Within the Adobe Sign Web UI there is a drag and drop interface. If you are using Adobe Sign API, there is also a way to place fields via X/Y coordinates.
When you use Adobe Document Generation add-in for Microsoft Word, you can easily tag your documents for both Adobe Document Generation and Adobe Sign at the same. It is available for installation in Microsoft AppSource. It works on both Windows, Mac, and also Microsoft Word Online.
Not only does Adobe Document Generation add-in allow you to tag your documents for document generation, it allows you to tag documents for Adobe Sign at the same time. Click on Advanced > Adobe Sign and you can add Adobe Sign fields.
What’s more, if you aren’t quite ready to use Adobe Document Generation API, you can still use it for just tagging your documents for Adobe Sign:
- Open the Adobe Document Generation add-in from the ribbon.
- Click on Get Started.
- Click Continue without JSON data.
- Click on Advanced.
- Expand Adobe Sign.
From here, you can place fields like Signature fields and even set conditions and place them in your Word documents.
You can set conditional sections of your document templates

Adobe Sign has always allowed you to merge data into form fields, common use-cases with turn-key integrations like Salesforce and Microsoft Dynamics. But if you want to add paragraphs and sections based on data, Adobe Sign doesn’t provide an excellent mechanism to do that and repaginate your document.
Fortunately, Adobe Document Generation does provide an great way to set conditional sections of a document. Using Conditional Content tags, you can set paragraphs and sections to only show when specific criteria are met. Here are a few examples:
- Only include a paragraph related to California if a customer resides there
- Only include information about a particular product in a contract if the customer is purchasing that product
- Add a particular flag on the document if specific criteria are met, like “High Risk.”
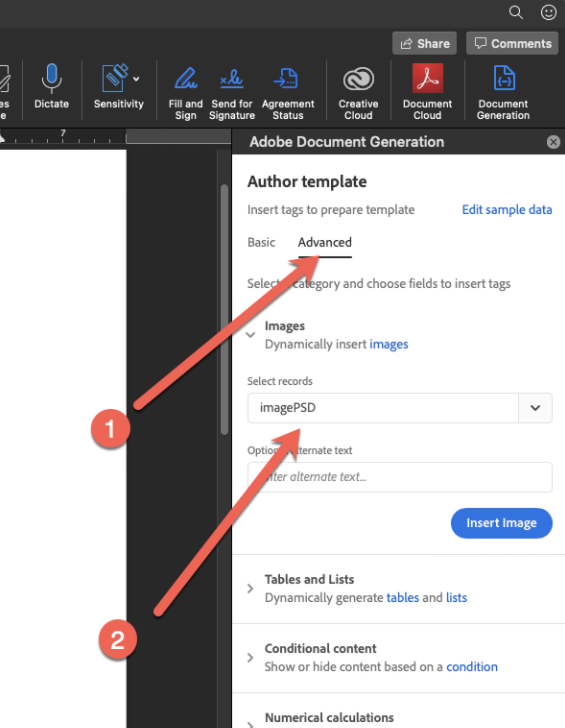
To add Conditional Content:
- Open Adobe Document Generation add-in in Microsoft Word and either add your sample data or create your schema.
- Click Generate Tags.
- Click on Advanced.
- Expand Conditional content.
- Select the paragraph or the section that you want to set as conditional.
- Under Select records, select the condition you want to test.
- Set the Operator you want to use. In this example >.
- Set the value you want to test.
You can also learn more here about how to create your own schemas in Microsoft Word with Adobe Document Generation add-in.
You can generate Word or PDF documents
When working with contracts, you may want to merge information into the document, but you may not be quite ready to have the document be a PDF because you may need to redline or edit the document. Adobe Document Generation allows you to merge data into your document and generate it as a PDF or a Word document. By generating it as a Word document, it can still be editable, and then you can upload that Word document to Adobe Sign when you are ready.
You can add dynamic tables and lists
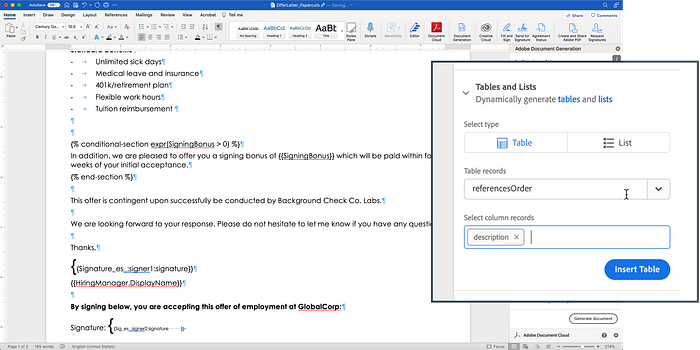
Because Adobe Sign has fixed content, it doesn’t allow you to dynamically grow the size of tables or reduce their size based on data. For example, if you have an invoice or a sales order, you want the number of items listed to grow or shrink based on how many things you include.
Adobe Document Generation API allows you to add tables dynamically based on an array of data in your table. That way, it will grow or shrink the document based on the number of items.
Dynamically add images
Adobe Sign has the concept of an image field that you can use to upload images as part of a signing ceremony. Sometimes you may, however, want to change images in a document dynamically. Some reasons why might include:
- Changing logos for different brands but keep the same template
- Add a supporting image as part of a document or contract
- Change colors and branding based on the same template
Adobe Document Generation API allows you to pass images as part of your data as Base64 so you can dynamically change images in your Word document.
Here are also some great tips on how best to use images with Adobe Document Generation API.
Both Adobe Sign and Adobe Document Generation are available in Microsoft Power Automate
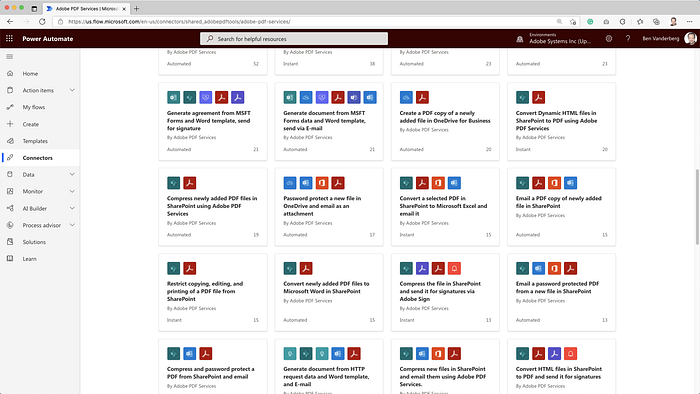
Microsoft Power Automate is users of Microsoft 365 create automated workflows without having to write any code. Adobe PDF Services (which includes Adobe Document Generation) is available as connectors within Power Automate, allowing you to easily and seamlessly tie document generation and e-signatures into your flows. There are also an article to help you get started.
In addition, there are a number of different templates available directly within Microsoft Power Automate which illustrates how to connect them together.
Add/remove optional signers
You may have agreements that require certain signatories or do not, depending on the criteria. For example, a contract greater than $100K requires a VP signature, while less than $100K does not.
Using Conditional sections in Adobe Document Generation, you can dynamically add or remove signatories based on criteria, or provide more information about your signers. For example, let’s say your data has information like this:
In your document, you can then use Conditional content to dynamically add or remove fields depending on how many signers. Here is a snippet of how to do that:
What you will notice above is the tag is an expression. It might look complex, but here is a breakdown of what it means.
expr()means that it is going to do an expression or a calculation in the output that is generated.$decodeUrlComponent("%7B%7B S")is a workaround so that Adobe Document Generation API will render the curly brackets{{required to show an Adobe Sign tag. If you write those in plain text, they are embedded in other{{}}tags for Document Generation and it will not render. It will also add "S" as the output. At this stage, it renders{{S.orderpasses the signing order so that there is a unique name for the Adobe Sign field. The field will output{{S1if order=1.- Then we want to add the
_es_:signerto declare it is an Adobe Sign field and that we are assigning it to a specific signer. The output is{{S1_es_:signer. - Next, we add
orderagain so that it assigns the field to the specific signer, so the output would be{S1_es_:signer1. - We then add the
:signatureto signify this is a signature field. Adobe Sign has other fields like:fullname,:phone, etc. If we add signature, then the output is{{S1_es_:signer1:signature. - Finally, we need to close the field with
}}, so we use the same technique as before and use$decodeUrlComponent("%7D%7D"). Your output should then look like{{S1_es_:signer1:signature}}.
If everything is written properly, then if you pass the data from Document Generation API into the template it should look like this:
Final Thoughts
Whether it is contracts, agreements, offer letters, sales orders, using Document Generation API with Adobe Sign allows you to dynamically generate your documents from data and send them for signature. For a long time Adobe Sign users, Document Generation API provides greater flexibility with your documents through conditional sections, dynamic tables and lists, dynamic images, and calculations.
If you would like to learn more about Adobe Document Generation API, go to the Adobe Document Generation API website where you can start a trial. You can also start using the demo playground here. Adobe Sign developer accounts are available here.